 There is an amazing little gem located in the Price Codes file: the Price Comparison button. It can be used for moulding, matboard, fabric, mat designs, mounting, hardware, extra and fitting. But the group that we find it most helpful with is Glass!
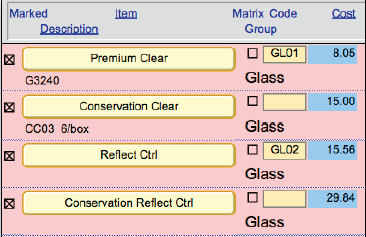 When looking at the types of glass you carry, you want to make sure that you have a smooth transition up to the next grade of glass. You also want to make sure that you don’t have any price dips. The Price Comparison screen was designed to do just that, by giving you a cross-reference of your retail prices.
The Price Comparison screen will display the items from the Price Codes List View and will also show the retail prices for UI measurements (18, 36, 54, 72, etc.) horizontally across the screen. This allows you to check your pricing both horizontally (for the individual item) and vertically (to see how it compares to other items).

Looking down the column of prices for 18 UI and 72 UI, you can clearly see where the price dips. You can also see that the prices for the smaller sizes of Conservation Reflection Control glass are too low in relation to it’s wholesale cost.
By reading the columns vertically, you can compare the prices for each type of glass (same size), to ensure a reasonable price increase as you move up to the next grade of glass that you carry.
TIP: Make your most profitable glass option your default. It is easier to downgrade a sale from museum to conservation clear than it is to start with premium clear and try to upgrade the glass. This may give you an opportunity to discuss glass qualities.
To access this screen: 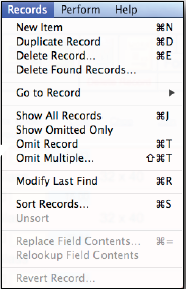
1. In the Price Codes file, find the items for which you want to compare prices. Eg. Glass (in the Group field)
a) You can mark the records you want to view and then perform a find for just the marked records.
b) Or, find a group of items and omit the ones you do not want on the list (from Records menu > Omit Records).
2. Click on the Form View button (top center).
3. Click on the Price Comparison Button (left side).
On the Price Comparison screen, you can change the cost, markup, and set price. You can also select the Combine box (to add a Code Table to your existing pricing). However, you cannot change code tables on this screen. You must go back to the form View in the Price Codes file in order to select a code table.
Note: You can only view items from the same group in order to have the prices appear correctly. (Eg. Glass, Hardware, Matboard, etc.) The screen is determined by the Group of the first item listed.
TIP: If you have used the Marked box, be sure to Unmark the records (with the Unmark All button) when you are done so that you are ready to use this feature again.

TIP: You can print out the price comparison screen and have a price chart if your computer is not available.