Shopify Integration
Shopify Integration Set Up
Follow these steps to set up the Shopify Integration in your FrameReady.
How to Set up the Shopify Integration
-
On the Main Menu, click the Setup Data button (top right).

-
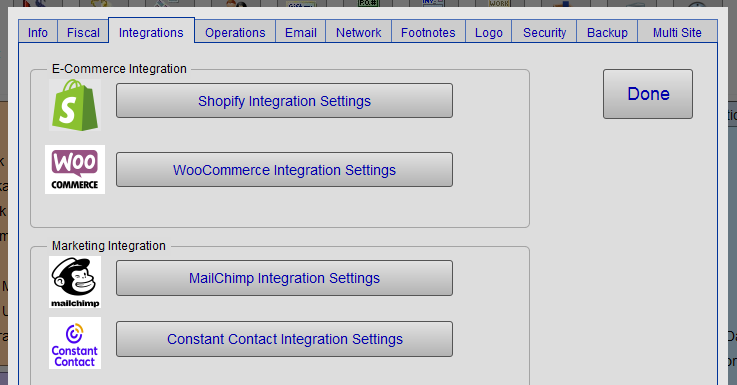
Open the Integrations tab.
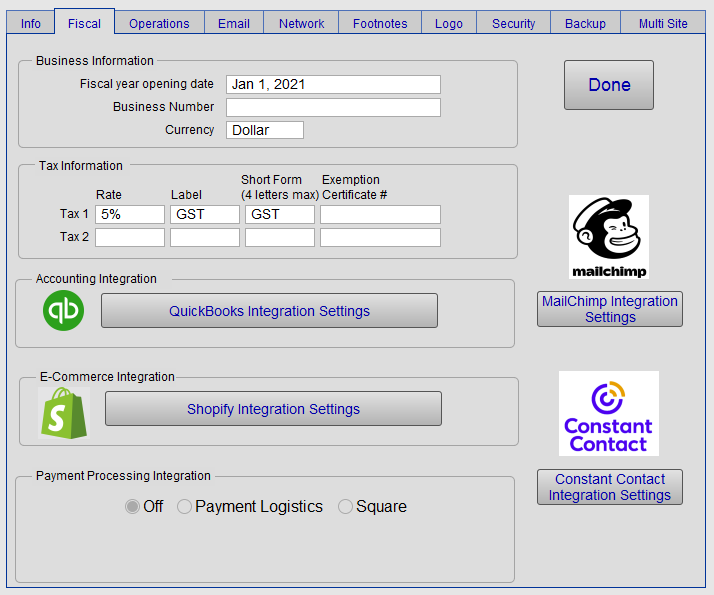
In FrameReady 13.1.3 or earlier, open the Fiscal tab.
-
Click the Shopify Integration Settings button. Do not close FrameReady.
-
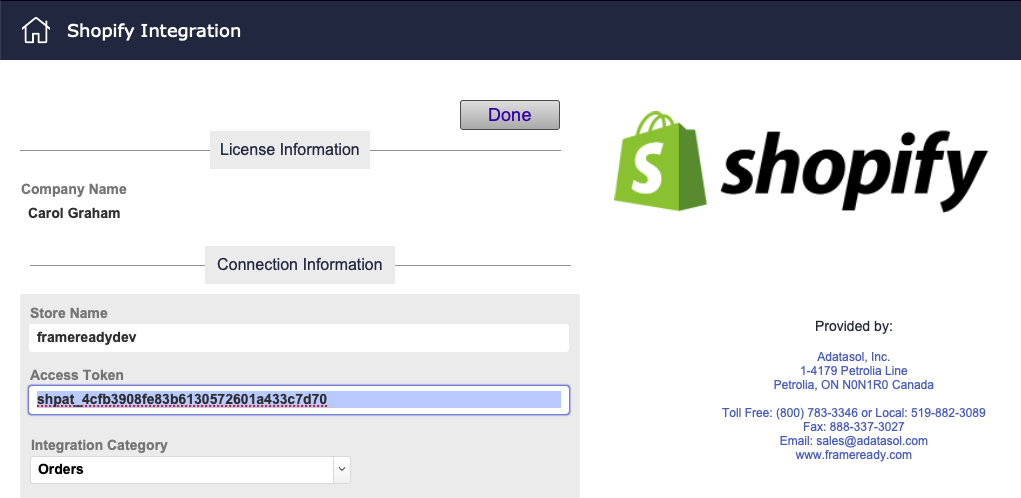
The Shopify Integration Settings opens. You will notice a few new fields: Store Name, Access Token and some others.
Before we can obtain the information for these new fields, you need to open your web browser and login to your Shopify Admin Center.
Connect to your Shopify Account
-
Go to www.shopify.com and log into your Shopify account.
-
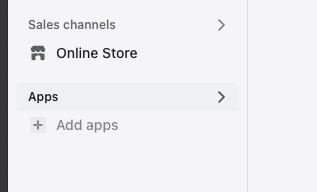
Once you are logged in, go to the left-hand side of the page, in the left sidebar, and click the Apps button.
-
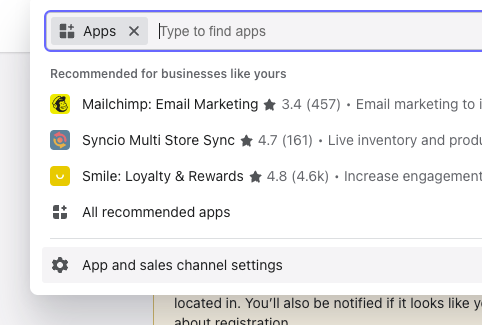
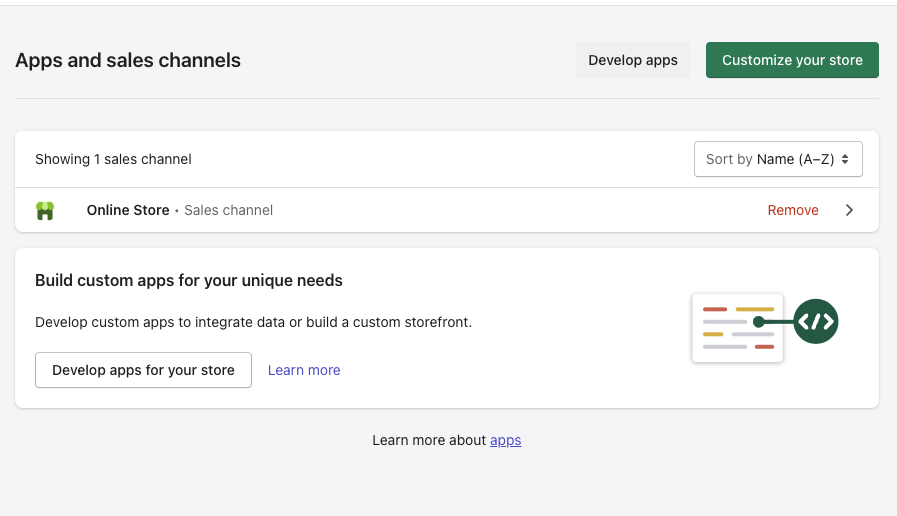
This opens up a dropdown as shown below; at the bottom click the option for Apps and sales channel settings to continue.
-
A new screen for App and Sales Channels opens. Click the Develop Apps button (left of the green Customize your store button); this allows you to begin the set up for the integration.
-
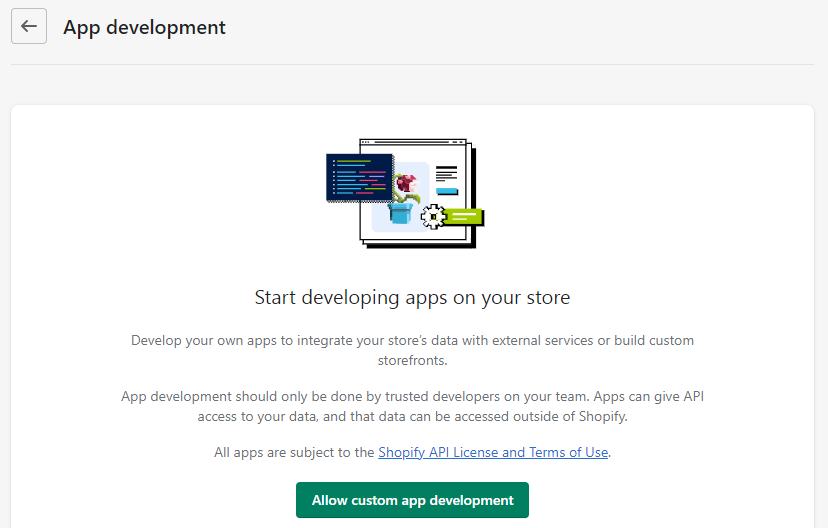
After clicking the Develop Apps button, the App Development screen opens for you to set up the Shopify Integration.
-
Click the green Allow custom app development button.
-
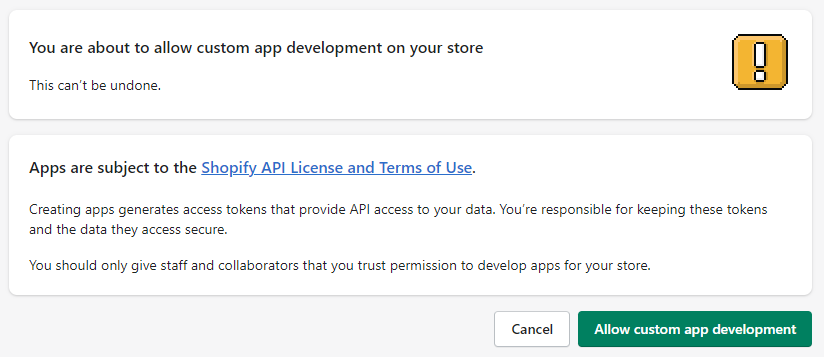
In the confirmation screen that appears, click the green Allow custom app development button. This cannot be undone.
-
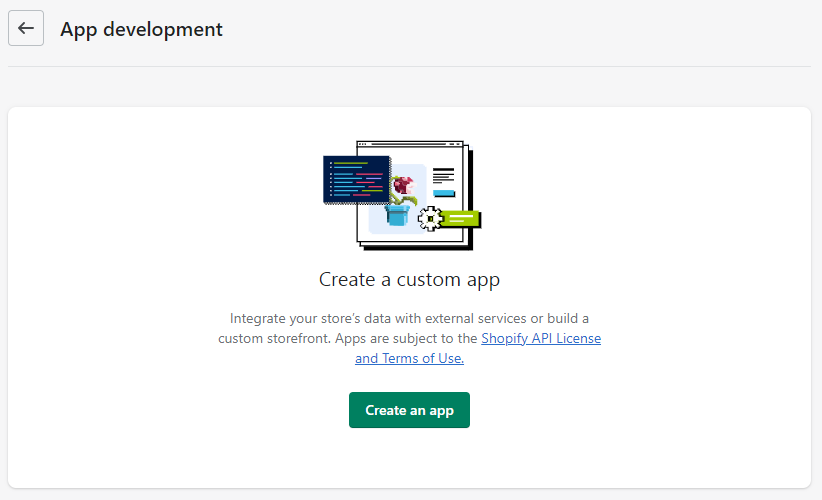
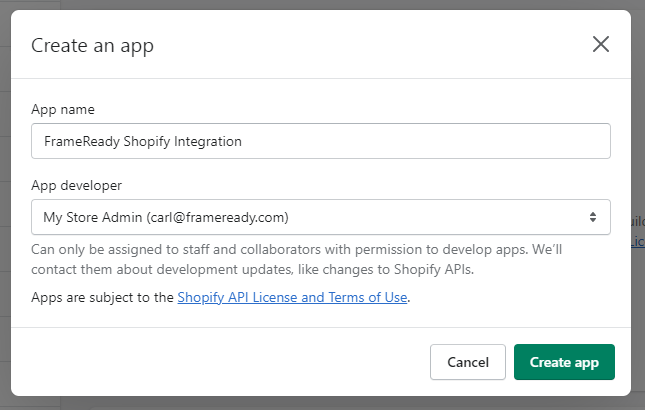
Finally, click tthe green Create an app button.
-
The screen dims and a popup window appears; enter the App name (e.g. FrameReady Shopify Integration) and select the App developer (leave as-is).
You can name the integration anything that you want but, in this example, we have named the app "FrameReady Shopify Integration". Your account's email address should appear in the App Developer field, which is fine.
-
Click the Create App button to create the integration.
-
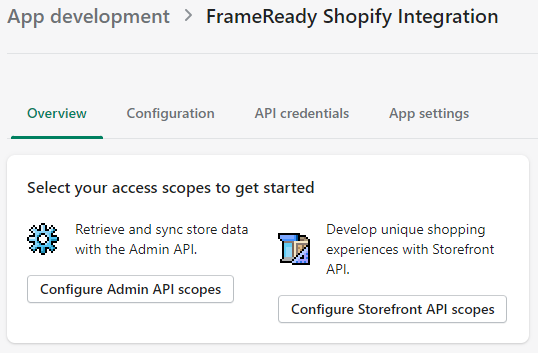
Once the integration has been created, you will see the configuration screen.
This is where we will specify what data we want Shopify to bring into FrameReady. At this time, we only support Orders, Products, and Customers, so we need to make sure we select the Admin API scopes for those.
Click the Configure Admin API scopes button.
-
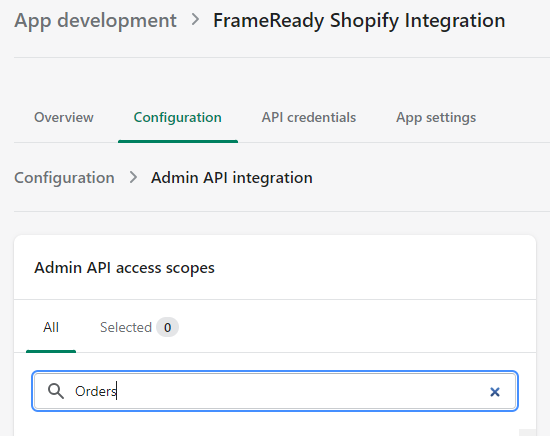
In the Filter access scopes field, enter the keyword: Orders
This field is a keyword filter and reveals the Admin API access scopes available for "orders".
-
In the Admin API access scopes section, below the field with the "orders" keyword, are the filtered results.
Scroll down and check the checkboxes for "write_orders" and for "read_orders"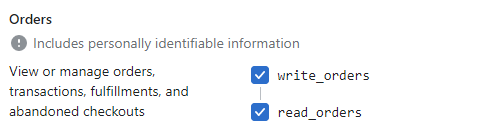
-
In the Filter access scopes field, clear out "Orders" and enter the keyword: Customers
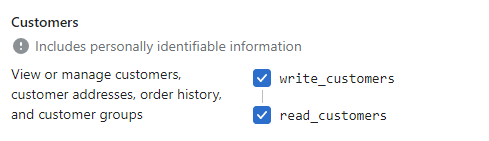
Scroll down and check the checkboxes for "write_customers" and for "read_customers" -
In the Filter access scopes field, clear out "Orders" and enter the keyword: Inventory
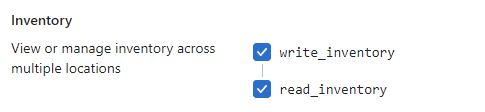
Scroll down and check the checkboxes for "write_inventory" and for "read_inventory" -
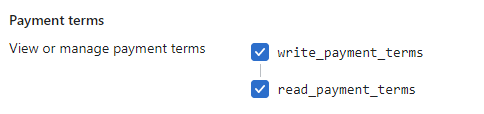
In the Filter access scopes field, clear out "Orders" and enter the keyword: Payment
Scroll down and check the checkboxes for "write_inventory" and for "read_inventory" -
In the Filter access scopes field, clear out "Orders" and enter the keyword: Product
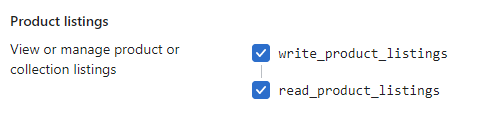
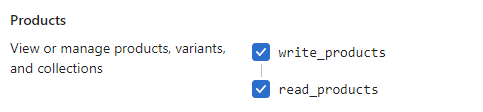
Scroll down and check the checkboxes for "write_product_listings", "read_product_listings", "write_products", and "read_products" -
Confirm that the following Admin API access scopes have been checked:
read_customers
write_customers
read_inventory
write_inventory
write_orders
read_orders
write_payment_terms
read_payment_terms
write_product_listings
read_product_listings
write_products
read_products -
After you have selected all the of Admin API access scopes, as shown above, then click the green Save button (bottom right of the page) to save these settings.
-
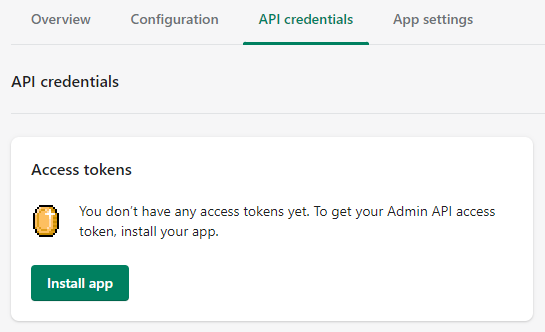
After you have clicked Save, then scroll up to the top of the page.
Click to open the API Credentials tab.
Then, to create an Access Token to enter into FrameReady, click the green Install app button.
-
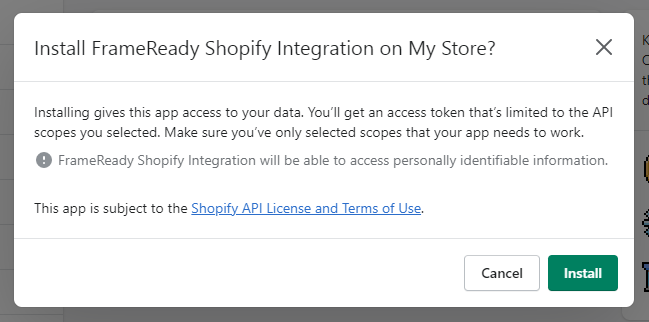
The screen dims and a popup window appears; click the green Install button.
-
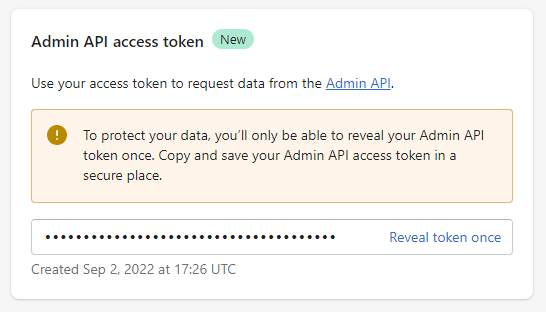
Shopify generates the Admin API Access token for you.
To protect your data, you can only see your Admin API token once!
Click the Reveal token once text button.
-
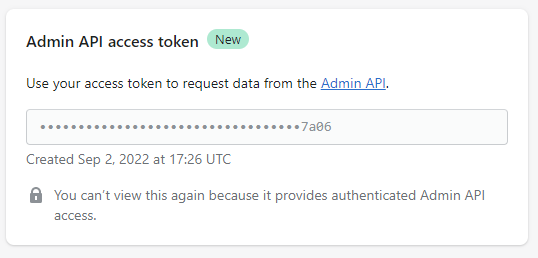
The token is revealed as a string of numbers and characters.
Either click the icon (on the right) to copy to the clipboard, or click the click into the field, highlight the token and copy it.

-
Copy and save your Admin API access token in a secure place. In the next step, you will enter the token into FrameReady.
Remember, you cannot view the token again.
How to Enter the Admin API Access Token into FrameReady
-
Return to FrameReady; the Shopify Integration Settings should still be open.
-
Click in the Access Token field and paste the Admin API Access Token that you copied from Shopify.
-
Next, paste your Store Name from your Shopify store into the Store Name field (above the Access token).
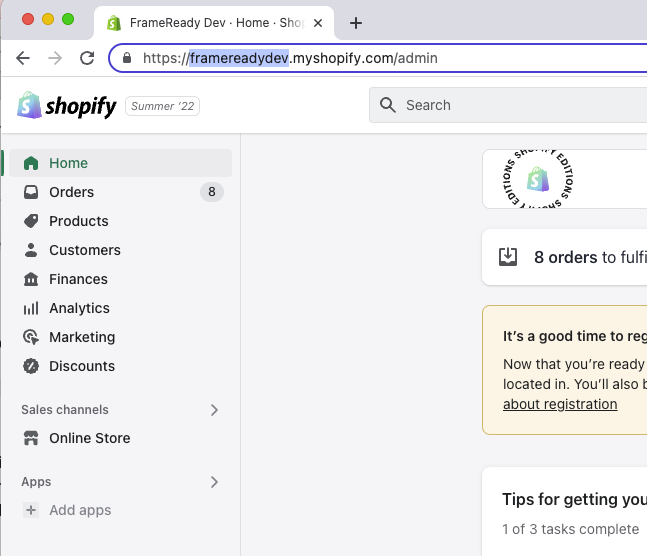
You can find the Store Name in the web address of your web browser for your Shopify store when you are logged in. It is the text that is in between the https:// and .myshopify.com .
In the example below, it is framereadydev . Once you have that copied, paste it into the Store Name field in FrameReady.
-
Click in the Integration Category field and choose either Orders, Products, or Customers.
-
If you select Orders, then you can import web orders from your Shopify store and FrameReady will check the customer on the order to see if that customer exists in FrameReady already. If the customer does not exist in FrameReady, then FrameReady creates a new Contact record for you. You can then view each order and review before converting them into FrameReady Invoices.
Then see these articles:
Work with Shopify Web Orders
Work with Shopify Products
Work with Shopify Customers
Tip: After you chose your Integration Category and start running the processes, Shopify automatically authorizes your store by using the Access Token so you do not need to do anything else to connect.
© 2023 Adatasol, Inc.