Networking
Set up External Drive for FileMaker Server Backups
How to use use an External Drive for your FileMaker Server Backups
-
Use an external hard drive to store FileMaker Server backups
-
See also: Backing Up FileMaker Server
Windows Server
-
Make sure the drive is formatted for FAT-32 (typically Windows formatting).
-
If you are are creating a sub-directory, then Windows automatically provides the correct privileges.
-
Open the FileMaker Server Admin Console.
-
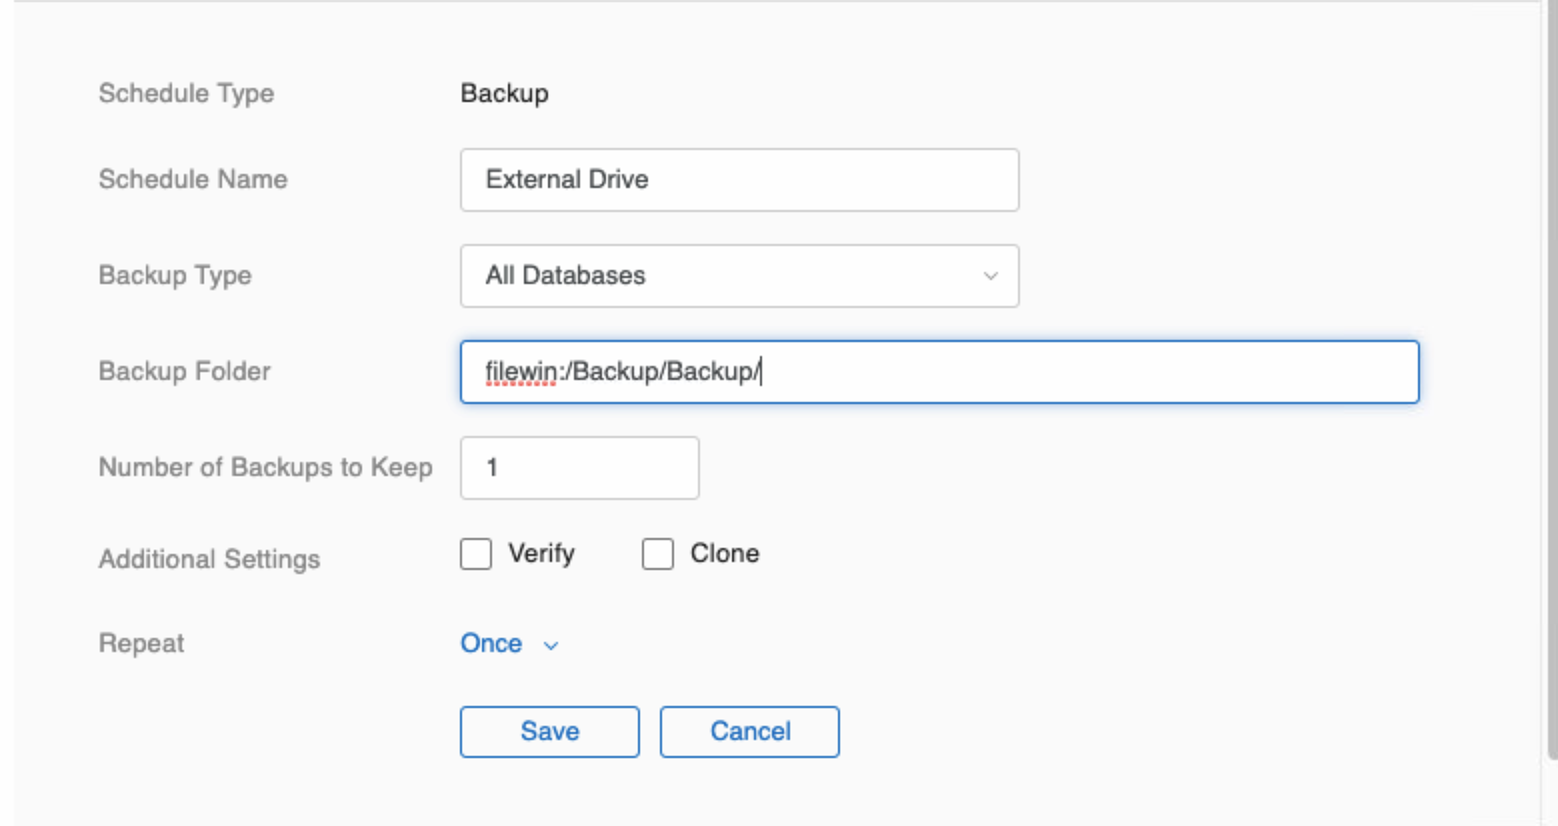
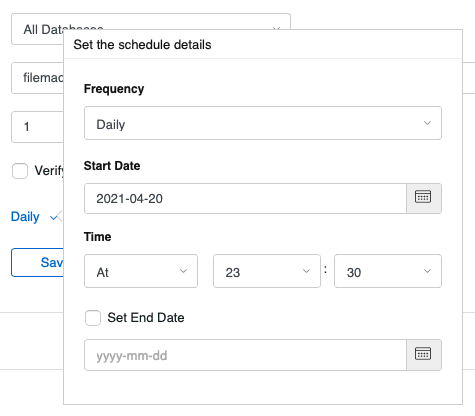
Open the Backups tab and create a schedule similar to the one below, where the external drive is called “Backup” and there is a sub-directory in the drive called “Backup”.
The entry IS case sensitive.
Path for Windows: filewin:/pathname-to-backup-folder/
Set Repeat to
-
Click Save.
macOS
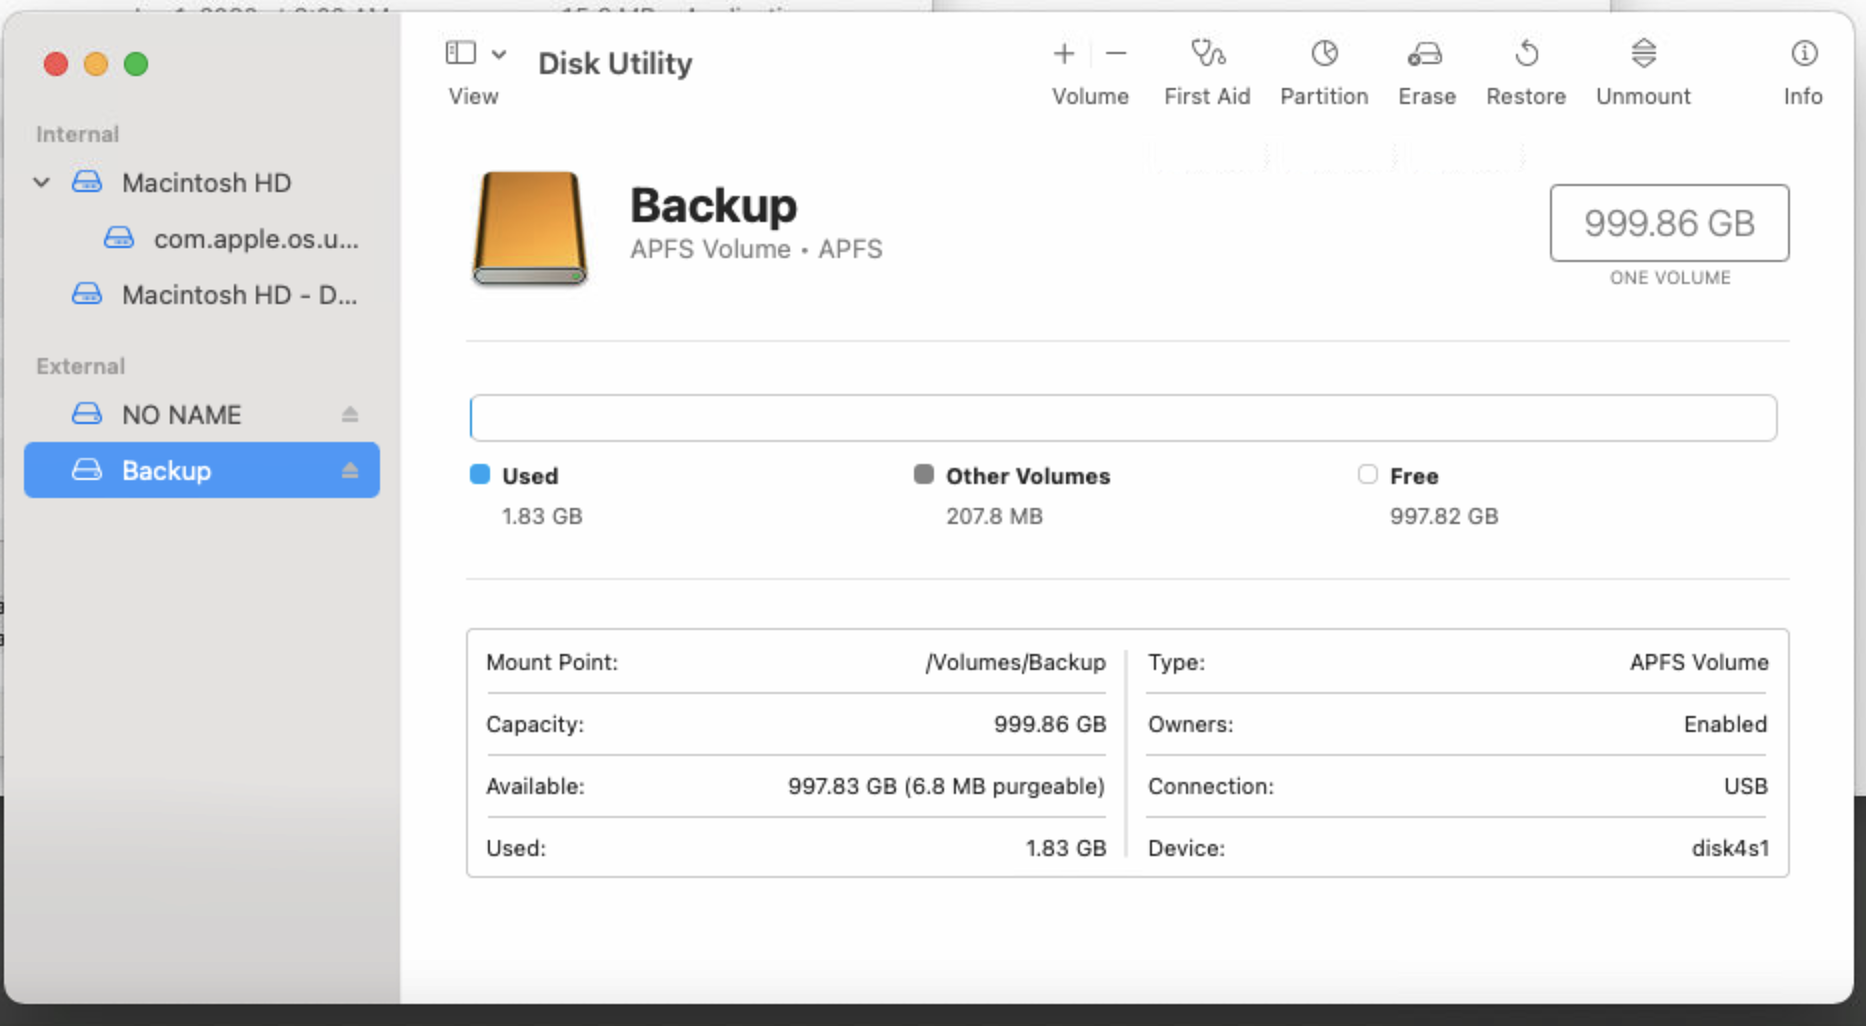
Open Disk Utility
-
Make sure the external drive is formatted as an APFS volume.
Open Disk Utility to examine the external drive.
Note that some external drives can be reformatted to APFS, while others seem unable to reformat. Consult Apple documentation for these steps.
-
Open Finder.
-
Rename the drive to External Backup and then create a Backup folder on the drive.
-
Right-click the external drive's name and choose Get Info.
-
In the Get Info window, change the privileges of the external drive. Click the “+” button to add a new user and, from the list, choose fmserver.
Confirm that the folder is owned by the user fmserver (or is in the group fmsadmin).
Confirm that the folder has read and write permissions for fmserver.
Click the Gear Icon and choose Apply to enclosed items. Doing this ensures that the Backup folder, as well as the drive, is also owned by fmserver.
Open System Preferences
-
Open System Preferences,
-
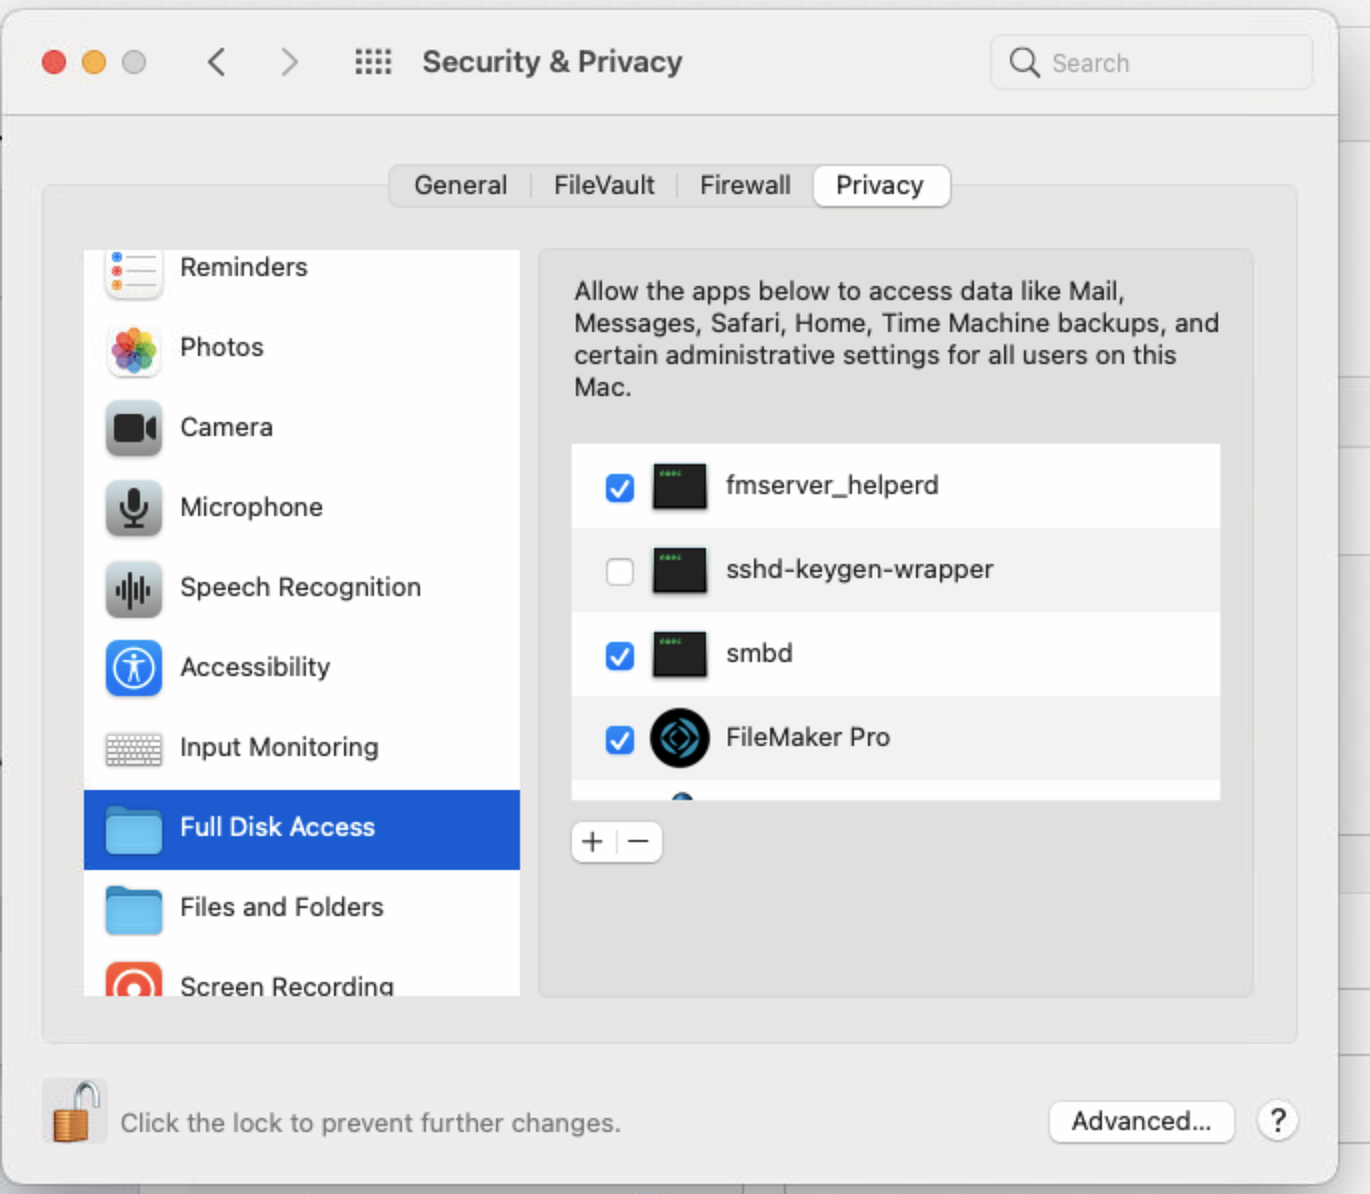
Click the Security & Privacy icon.
-
Click the Privacy tab button.
-
Under Full Disk Access, make sure the fmserver_helperd selection is checked.
If it is not listed, then click the + button and use the browse file window to locate the file:
Macintosh HD > Library > FileMaker Server > Database Server > bin > fmserver_helperd
Note: You may need to click the Padlock icon and enter your Mac OS username / password to make this change.
-
Security & Privacy window:
Open the FileMaker Server Admin Console
-
Open the FileMaker Server Admin Console.
See: Opening the FileMaker Server Admin Console -
Open the Backups tab.
-
Click Backup Schedules (lower left).
-
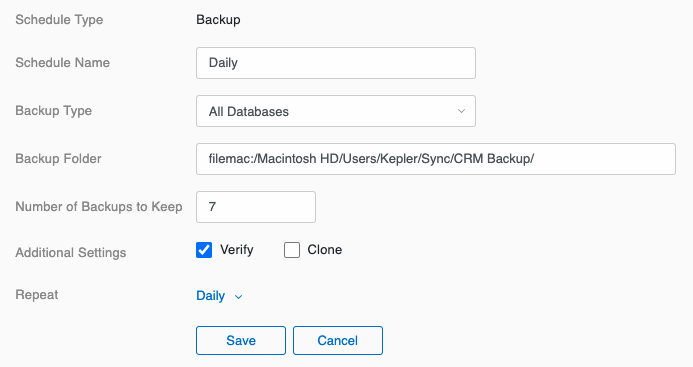
Click the Create Schedule button and create a schedule similar to the one below, where the external drive is called “Backup” and there is a sub-directory in the drive called “Backup”.
The entry IS case sensitive.
Path for macOS: filemac:/pathname-to-backup-folder/
For example, filemac:/External Backup/Backup/
Make sure that the folder has permissions set correctly so that FileMaker Server can read and write to the folder.
ON macOS, the local folder must be owned by the FileMaker Server user account (fmserver) (or in the group fmsadmin). -
Change the Number of Backups to Keep (assuming one per day) to a number useful to you, e.g. 7.
-
Under Additional Settings, check Verify.
-
Click Repeat and change the frequency to Daily.
Adjust the Time field to a late evening time, e.g. 23:30 (11:30pm). Click outside the schedule details window to close it.
-
Click Save.