Pricing Options For Mat Design, Hardware, Extra, and Fitting
Pricing can be calculated by a Formula, a fixed amount per item, a price per UI, a Code Table or a combination of Formula and Code Table using the Pricing tab.
Introduction
-
Mat Design, Hardware, Extra, and Fitting sidebar screens are similar in layout and provide the opportunity to price items, services, or labour.
-
There may even be items listed in these groups with no prices, e.g. wire hanger, shrink wrap, reverse bevel. These ‘no cost’ items serve to inform the framer of items or labor to be used on this project.
-
FrameReady allows for unlimited labor and fitting charges, for example polystyrene frames which take more effort to glue. You can charge different prices for joining different types of frames.
-
In the Price Codes file make sure you have a separate record for each type of joining. These records appear in the drop-down list on the Work Order screen under Fitting. You may want to have quite a detailed list for the designer to choose from. Also include a charge for fitting a mat into a readymade or customer’s own frame!
Pricing Considerations for Mat Design, Hardware, Extra and Fitting
Three Things to Consider when Pricing
-
A combination of a Charge Per UI plus a Set Price, e.g. labour charge. The UI is based on the frame width and height rounded up to the nearest inch.
For example, a V-groove where a labor charge of $3.00 is applied plus $0.15 per UI to accommodate various mat sizes. -
Straight Charge per UI.
For example, a charge for doing an inlay mat. -
A single Charge or Set Price for items that are not affected by the size of the frame.
For example, custom mat corners where the size of the mat has no bearing on the time you spend laying out and executing the cuts.
How to set up Pricing for Mat Design, Hardware, Extra and Fitting
-
After customizing your lists in each of these groups, please review the default pricing for each item and adjust to suit.
Create your Pricing Structure
-
You will need to set up the pricing for the items in Mat Design, Hardware, Extra, and Fitting.
-
This pricing is based on either a Set Price, Price per United Inch, combination of these, or a Code Table (or pricing chart).
Tip: If you haven’t raised your prices in a few years, then this might be a good time to do it--while you are looking at your current pricing system.
-
In Price Codes, click a Group sidebar button, e.g. "Mat Design"
-
Click the List View button to see items in that group.
-
While in List View, select an Item by clicking on the item name shown.
The screen switches back to form view. -
If applicable, enter a wholesale cost into the Cost field (blue box on left).
-
Open the associated Pricing tab, i.e. Mat Design Pricing, Extra Pricing, Fitting Pricing, Hardware Pricing.
Inside the Pricing tab, are several pricing options:-
Set Price
-
Price per United Inch
-
Set Price + Price per UI
-
Minimum + Price per UI
-
Code Table
-
Pricing Options Explained for Mat Design, Hardware, Extra and Fitting
Option: Set Price (also Fixed or Flat Rate Pricing)
The Set Price field is a flat rate amount, e.g. Shop Hour Rate = $70. The retail price is the same regardless of the size.
-
In the Set Price tab, enter the amount into the large field below the Set Price = box.
-
You can also add equations such as 10 + 2 .
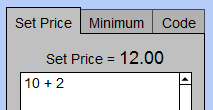
The “Set Price =” box shows the answer of 12.
Option: Price per United Inch
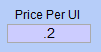
To price by an amount per United Inch, use the Price per UI field, e.g. Glass Cleaning = $0.20 per UI
-
Enter the amount as a decimal, e.g. 0.2 , into the Price per UI field.
The calculated prices in the Pricing Sampler update.
Option: Set Price + Price per UI
You can combine the Set Price and Price per UI by entering values in both fields. This often give a better pricing balance.
Remember:
-
the Set Price affects the smaller sizes the most
-
the Price per UI affects the larger sizes the most
You may need to click the Reset button to see the calculated prices in the Price Sampler, e.g. Fillet Fit price increases gradually with size but small sizes still maintain a nominal fee.
Option: Minimum + Price per UI
You can set a Minimum Price value if you want to adjust low prices and bump them up to a fixed minimum. To illustrate how this work:
-
Create a temporary Price Code Item.
-
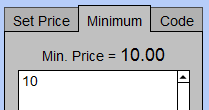
In the associated Pricing tab, set a Price per UI of 0.2
The calculated prices in the Pricing Sampler update: a 5x7 is 3.00 -
Open the Minimum tab and enter 10
-
The calculated prices in the Pricing Sampler update: a 5x7 is now 10.
Scan the price column to see how the values have been adjusted.
Option: UI Code Table (Pricing Chart)
This method is best when you wish to duplicate a price chart for which you do not know how the pricing was devised, e.g. supplier generated chart, or cannot duplicate with any of the methods listed above.
-
You will need to recreate the chart in what we call a Code Table, which is based on united inches or on a set size, e.g. 32x40. Then apply that code to the item to use the table for pricing.
See: Code Tables
Wrap Up
-
Use the yellow arrows at the top of the screen to move through your records one at a time to price each item in the group. You can always come back later and tweak your prices; so don’t worry about making them absolutely perfect the first time.
-
Once you have finished the pricing for Mat Design, Hardware, Extras and Fitting, it is time to look at the pricing for the next group: Pricing Mounting and Glass.
Important
There are multiple screens for setting price defaults: one each for moulding, matboard, fabric, glass and mounting.
© 2023 Adatasol, Inc.