Invoices
Set up Tender Terms
You may edit the list of Tender terms that are available when taking a payment.
-
There are certain terms in the Tender field which are important and should not be changed.
-
You can also set the order in which the Tender terms appear when taking a payment.
Do Not Edit or Remove these Tender Terms
The following terms are reserved in FrameReady; please use them as-is without renaming them.
"Cash", "Check"
-
Used to identify cash and check/cheque sales.
"Deposit", "Refund"
-
Used to identify deposits and refunds.
"Refund – Store Credit"
-
Creates a new record in the Gift Cert/Card file for the customer receiving the credit.
"Store Credit", "Gift Card" and "Gift Certificate"
-
When used in conjunction with the Reference # field, searches for a credit in the Gift Cert/Card file and applies it to the current Invoice.
-
If only part of the credit is used, then a new store credit is issued for the balance.
"Reward Points"
-
Used when a customer is redeeming points collected through previous purchases.
All other terms in the Tender field simply indicate how the transaction was conducted.
How to Edit the Tender List (FrameReady 13.1 or newer)
-
On the Main Menu, in the file menubar, click Perform and choose Restore Full Menus.

-
Again in the file menubar, this time click Windows > Show Windows and choose Data05.
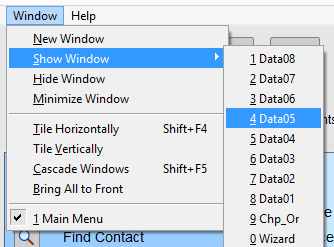
-
The Data05 utility window appears.
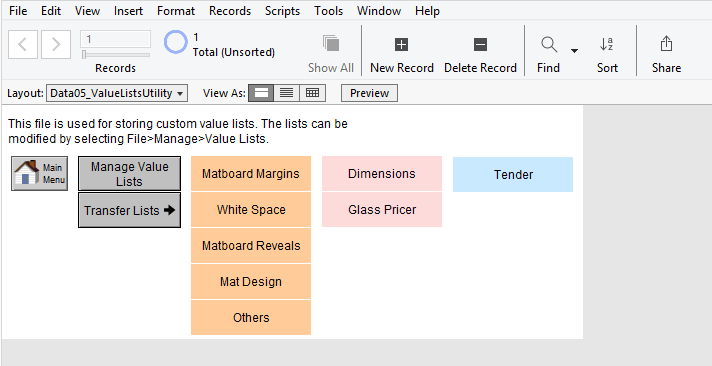
-
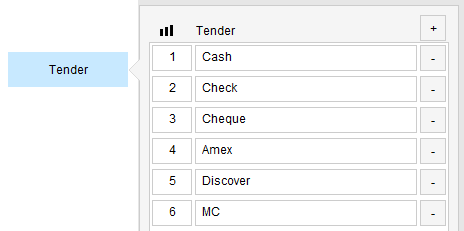
Click the blue Tender button to reveal the values.
Payment types are listed first; Returns, Refunds, and Voids are listed below.
-
The first column is the Sort Order. Use whole or decimal numbers, e.g. 3 or 3.5 to change where the item appears in the list.
Use the + icon (top right) to add an entry to your list of Tender items.
Scroll down to the bottom of the list and type the new tender into the empty field.
When seen on an Invoice, all values are sorted by the Sort Order number. -
Use the - icon (right of each entry) to remove an item.
-
When you are finished with your changes, click the Main Menu button (left side) to exit and return to the Main Menu.
How to Edit the Tender List (FrameReady 13.1 or older)
To edit the items in the Tender drop-down list, do the following:
-
Go to an unpaid Invoice (Form View) and click the Data Entry button.

The Line Item Entry screen appears. -
Click the small Edit button (located below the Enter a Payment button) in the Payments section.
The Receipts dialog box appears. -
Click in the Tender field, scroll down to the bottom of the list, and select Edit…
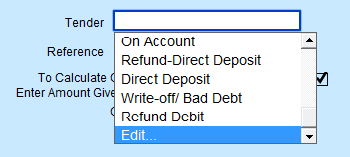
-
The Edit Value List “Custom 13” dialog box appears.
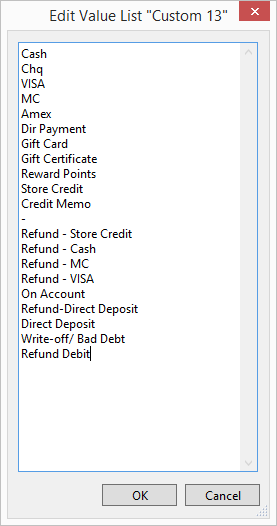
-
Click in the box and modify the list to suit your needs, e.g. change Chq to Check. When you have finished making your changes, click OK.
You return to the Receipts dialog box. -
In the Receipts dialog box, click the Cancel button if you do not wish to enter a payment on this Invoice (you may have to choose a Tender type first to continue).
-
If you do want to enter a payment, then make your selections and click Done.