Setting Up Basics
Work Orders
Set up your Completion Email Message
Completion Email Overview
-
When a Work Order is marked as complete, a "Framing Ready for Pick-Up" email message can be sent to the customer as a courtesy pickup request/notification.
-
The message is composed automatically using the information on the work orders: name, description, sales rep, etc.
-
Use this screen to customize your message by adding days & hours you are open, tag line, sales promo, etc.
Tip: This is a wonderful customer service tool. You should ask the customer's permission while you are taking in the work order if they would like to receive an email notification when their piece is ready for pick-up.
Use this tool to set yourself apart from your competition and save your staff time and effort. Unclaimed framing is difficult to store and, if you have not received full payment, costly.
How to Edit the Email Message
-
Click your cursor into the Subject or Body field.
-
Position the cursor to the precise position you wish to insert a merge field.
-
Choose a merge field button, e.g. First Name, and observe that <FirstName> was inserted into the text.
This is the mail merge code that FrameReady will use to build the custom message.
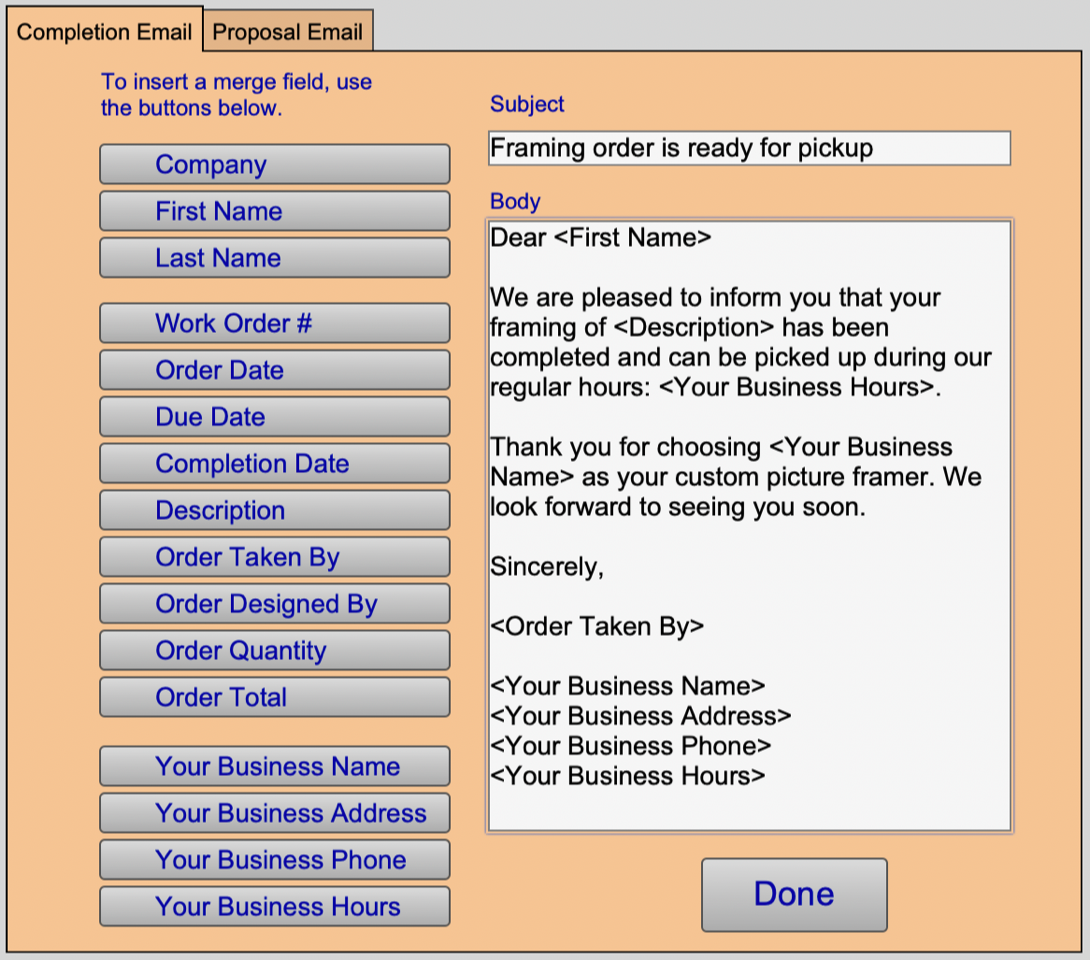
Default Completion Message
Subject: Framing order is ready for pickup
Body:
Hi <First Name>
We are pleased to inform you that your framing of <Description> has been completed and can be picked up during our regular hours: <Your Business Hours>.
Thank you for choosing <Your Business Name> as your custom picture framer. We look forward to seeing you soon.
Sincerely,
<Order Taken By>
<Your Business Name>
<Your Business Address>
<Your Business Phone>
<Your Business Hours>
How to Use Mail Merge Fields
Caution: It is recommended that you use the field buttons to insert the merge codes as this reduces typo errors.
To remove an inserted merge code, position the cursor and use the Backspace or Delete keys to remove the code (be sure to also remove the < and > brackets)
Email Merge Fields
Company: Inserts the contents of the Company field from the Contact file.
First Name, Last Name: Inserts the contents of the Last Name field from the Contact file. Remember to enter a space between the first and last name fields in the email message.
Work Order # (Completion Email only): Enters the number of the Work Order from the Work Order file.
Job Number (Proposal Email only): Inserts Job Number (instead of Work Order #).
Order Date: Enters the date the Work Order was created as shown on the Order tab.
Due Date: Enters the Due Date field from the Order tab in the Work Order file.
Completion Date (Completion Email only): Enters the date, from the shop tab of the Work Order file.
Description: Enters the title of the art or description of the piece as it appears on the Work Order screen.
Order Taken By: Enters the name of the sale rep which appears in the Order Taken By field on the current order.
Order Designed By: Enters the name which appears in the Designed By field on the Work Order.
Order Quantity: Enters the number in the bright yellow quantity field of the Work Order.
Order Total: Enters the total amount of the framing order including taxes and discounts. Does not reflect any payments.
Your Business Name: Inserts the Business Name as set in Setup Data > Info tab.
Your Business Address: Inserts the Business Address as set in Setup Data > Info tab.
Your Business Phone: Inserts the Business Phone as set in Setup Data > Info tab.
Your Business Hours: Inserts the Business Hours as set in Setup Data > Operations tab.