Invoices
Receipt Printer Set Up
Important: The Print Receipt icon in the Invoices file is specifically designed to work only with receipt printers. The layout is not formatted for use on Letter (8.5 x 11) paper.
Set Up for Windows
With a Receipt Printer using Windows
-
Open FrameReady with the level4 password.
-
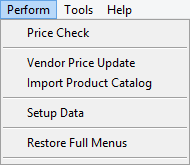
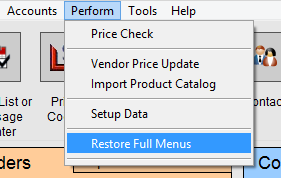
On the Main Menu, in the menu bar, click Perform and choose Restore Full Menus.
-
Caution: You now have access to FileMaker controls.
User Name Set Up
-
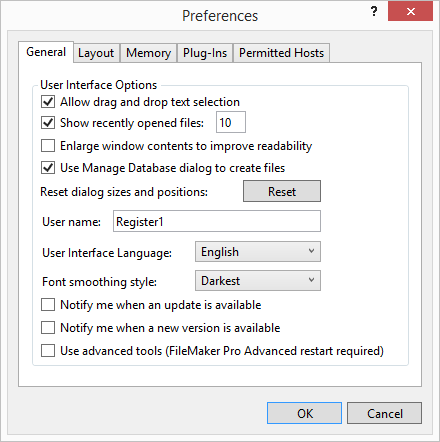
In the menu bar, click Edit and choose Preferences.
-
The Preferences window opens.
-
Take note of the User Name field: it should be Register1
If it isn’t so named, then rename it accordingly. What this does is identify the computer and corresponding receipt printer which is attached to the computer on the network. -
Click OK to close the window.
Receipt Printer Set Up
-
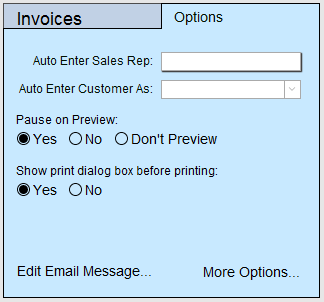
On the Main Menu, in the Invoices section, open the Options tab.
-
Click the More Options... button.
-
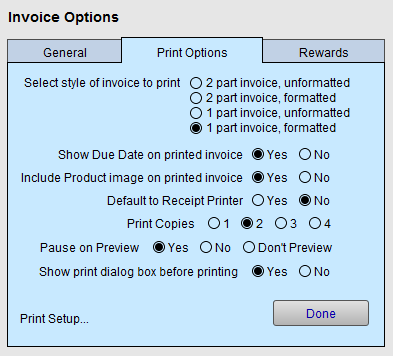
Open the Print Options tab.
-
Make sure that Default to Receipt Printer is set to Yes.
-
Click Done.
Script Set Up
-
In the menu bar, click Perform and choose Restore Full Menus.
If the Perform menu does not appear, then full menus have already been restored.
-
Click the Invoices icon.

-
In the menu bar, click Scripts and choose Script Workspace.

-
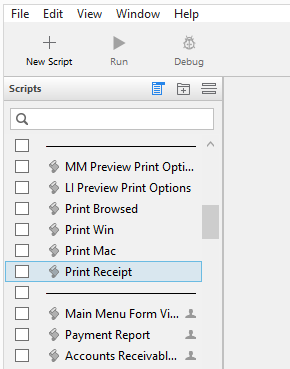
The Script Workspace opens. In the left column, scroll to the item labelled Print Receipt.
-
Single-click Print Recieipt to see the script.
Note: Do not click the checkbox. -
In the right-hand pane, double-click on the 7th line that says, Print Setup.
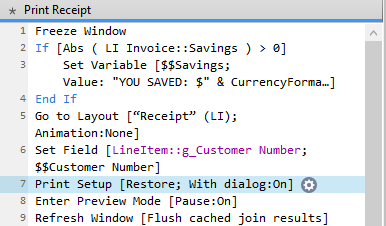
-
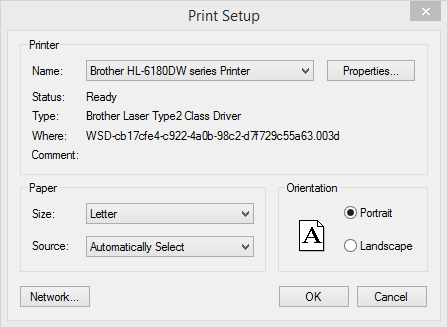
The Print Setup window appears.
-
Select your receipt printer in the printer.
If you do not see your receipt printer, then you need to install the appropriate print driver before proceeding. -
Select the correct paper size for the printer (usually 72mm x Receipt).
-
Click OK to close the Print Setup window.
-
Next, look for the script line that ends with the user name of the computer you are configuring, for example Else If [Get ( UserName ) = “Register1”].
Directly below that line, double-click the Print step. -
The Print Setup window appears. In the Print dialog box, select the receipt printer that is connected to the computer.
-
Select the number of copies to be printed (if more than one).
-
Click OK to close the Print dialog window.
-
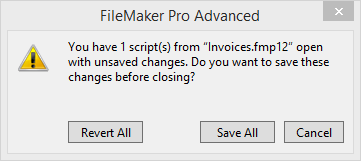
Close the Script Workspace window.
-
A Save dialog box appears.
-
Click Save All.
The FrameReady Invoice window appears. -
Run a test print by clicking on the Invoice Printer icon.
If the test is okay, then return to the Main Menu, exit FrameReady, and re-open with the appropriate user name and password.
If the print test fails, then follow the steps again or call tech support. If the print is blank, check that the thermal paper has been installed correctly.
Repeat for each computer that has a receipt printer attached to it.
Set Up for Macintosh
With a Receipt Printer using a Macintosh.
-
Open FrameReady with the level4 password.
-
In the menu bar, click Perform and choose Restore Full Menus.
-
Caution: You now have access to FileMaker controls.
User Name Set Up
-
In the top menu bar, click FileMaker Pro and choose Preferences.
-
The Preferences window opens.
Take note of the “User Name”. It should be “Register1” or “Register2” or “Register3”. If it isn’t so named, then rename it accordingly. What this does is identify the computer and corresponding receipt printer which is attached to the computer on the network. -
Click OK.
Receipt Printer Set Up
-
On the Main Menu, in the Invoice section, open the Options tab.
-
Click the More Options… button.
-
Open the Print Options tab and make sure that Allow for use of receipt printer is set to Yes.
-
Click Done.
Script Set Up
-
In the menu bar, click Perform and choose Restore Full Menus.
If the Perform menu does not appear then full menus have already been restored. -
Click the Invoices icon.
-
In the menu bar, click Scripts and choose Script Workspace.
-
Look for the line that says, Print Receipt and double-click (or select the line and click the Edit button).
Note: Do not click the check box. -
In the right-hand pane, double-click on the 4th line that says, Page Setup.
-
Select your receipt printer in the printer drop down menu.
If you do not see your receipt printer, then you need to install the appropriate print driver before proceeding. -
Select the correct paper size for the printer (usually 72mm x Receipt).
-
Click OK.
-
Look for the line that ends with the user name of the computer you are configuring (e.g. Else If [Get ( UserName ) = “Register1”]). Double-click the Print step that is directly below the line.
-
In the Print dialog box, select the receipt printer that is connected to the computer.
-
Select the number of copies to be printed (if more than one).
-
Click OK, and then click OK again.
-
Click Edit Script.. close button (X). Save changes.
-
Click Manage Scripts close button (X).
-
Run a test print by clicking on the Invoice Printer icon.
If the test is okay, return to the Main Menu, exit FrameReady and re-open with the appropriate user name and password. If the print test fails, then follow the steps again or call tech support. -
Repeat for each computer that has a receipt printer attached to it.