The Scenarios Feature Explained
Scenarios feature allows you to compare and store up to five different frame designs on a single Work Order.
-
Instead of creating multiple Work Orders in order to price out different design possibilities, you can save a snapshot as a "Scenario."
-
For each design possibility (or Scenario) you and the customer can see a side-by-side comparison of the components and price, all from the same Work Order.
-
When the customer has selected the design they want, it can then become the frame design for the Work Order.
How to Use Scenarios
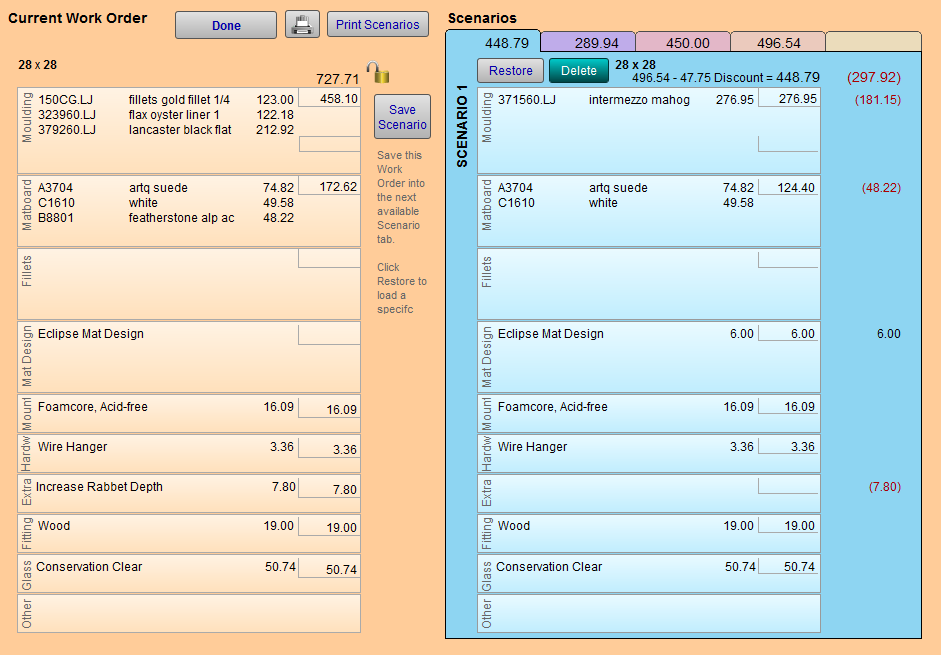
Note: Scenarios uses the price of the design as the tab heading -- because that is usually how people remember one design from another. In the above example, 448.79 is a separate tab.
-
Create a frame design on a Work Order as you normally would and then click the Scenarios button.
-
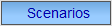
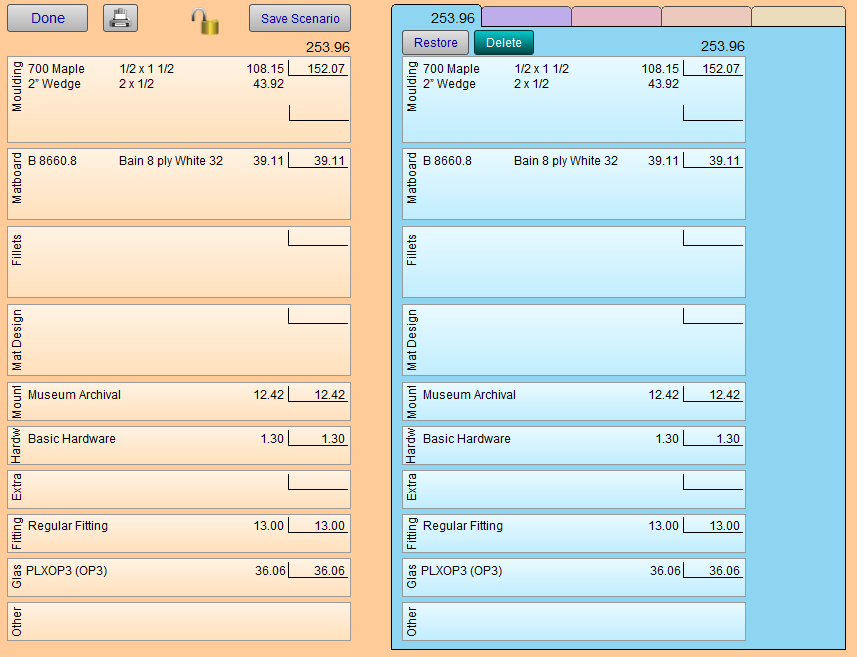
The senarios window appears.
On the left are the frame components on the current Work Order.
To the right is a 'storage' area with five tabs. Each tab can hold a different Work Order scenario. In the above screenshot, no scenarios have yet been created.
-
Click the Save Scenario button.
-
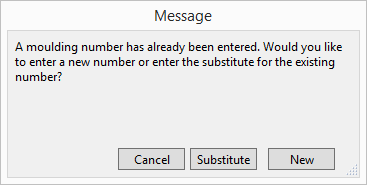
A copy of the frame design currently on the left side of the screen is created and stored in the first tab on the right. The price of the current design becomes the name of the tab, e.g. 253.96
-
Click the Done button. The Work Order screen re-appears.
-
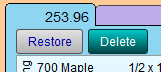
Make whatever changes necessary on the Work Order to create another design option, e.g. add a mat, change the frame, change the glass, add a fillet, etc. Remember, your first design has been safely stored in the Scenarios screen.
When changing an existing item, a dialog box appears warns that a number has already been entered; would you like to enter a new number or substitute for the existing number? Choose New.
-
To compare the first design with the second, click the Scenarios button.
The two designs appear side-by-side for comparison price-wise.
If the design in the Scenarios tab is more than the one in the Work Order, then the price difference is displayed in black.
If the price is less, then it is displayed in red, in parentheses. -
To add your second design as a scenario, click the Save Scenario button.
The second design is stored in the second tab, using the price as the tab name. -
If you wish to return your first design to the Work Order, then switch to the first tab and click the Restore button.
All materials from the first design in the first tab replace the items on the left side of the screen. Materials that appear in the salmon/orange area of the screen on the left are the items that will be entered into the Work Order when you click Done. -
To print multiple scenarios, click the Scenarios button, then click the printer icon button.
Tip: You can store up to five designs in the scenarios storage tabs as you work with your customer. When your customer is ready to make a decision, simply Restore the scenario of their choice.
© 2023 Adatasol, Inc.